 By Claire Whitaker
Good garden soil for flower beds is loose enough for roots to spread, rich enough to feed blooms all season, and drains well after rain. You can get there by testing what you have, correcting the main problems, and adding organic matter before you plant. This guide walks through each step so you can build a bed that holds up through the growing season.
Start by Understanding What You Already Have
Before you buy a single bag of amendment, take a close look at the soil you’re working with. Most garden problems come down to three things: texture, drainage, and nutrient balance. Guessing at these usually leads to wasted effort and money.
Shopping for one? See our guide: 8 Best Flower Garden Edging Ideas for Defined Beds in 2026.
Check the Texture
Dig a hole about 12 inches deep and pull out a handful of soil from the middle of the profile. Moisten it and squeeze it into a ball, then press it between your thumb and finger. Sandy soil feels gritty and won’t hold a shape. Clay feels sticky and forms a ribbon when squeezed. Loam feels smooth and crumbly and holds a loose ball. If you want more detail on the categories, see Understanding Clay, Sandy, and Loam Soil for Your Garden. For a deeper look, Best Metal Raised Garden Beds for Home Gardens: 5 Beds Compared covers this in detail.
Check Drainage
Dig a hole roughly 12 inches deep and fill it with water. Let it drain completely, then fill it again and time how long it takes to empty. Water that drains within an hour or two is generally fine for most flowers. If it sits for many hours, you have a drainage problem that needs addressing before planting.
Test the pH and Nutrients
Most flowering plants prefer slightly acidic to neutral soil, roughly pH 6.0 to 7.0, though some (like hydrangeas and azaleas) have specific preferences. A basic test kit or a lab test from your local cooperative extension office gives you a reliable reading. Follow the steps in How to Test and Adjust Your Garden Soil’s pH Level to interpret your results. Lab tests usually also report phosphorus, potassium, and organic matter levels, which are useful for planning amendments.
Step-by-Step: Building Good Garden Soil for Flower Beds
Step 1: Clear and Loosen the Bed
Remove weeds, grass, and debris. Then loosen the soil to a depth of 8 to 12 inches using a garden fork or tiller. Work only when the soil is moist but not soggy. If you squeeze a handful and it forms a tight, muddy clump that doesn’t crumble, wait a few days for it to dry. Working wet clay damages its structure and can leave it hard as concrete once it dries.
Step 2: Fix Compaction
If the soil is packed hard, roots won’t penetrate and water will run off instead of soaking in. Breaking up compaction usually means incorporating organic matter over time and avoiding foot traffic on the bed. For a detailed approach, read How to Fix and Prevent Compacted Garden Soil.
Step 3: Add Organic Matter
Organic matter is the single most useful addition for most flower beds. It improves structure in clay, increases water holding capacity in sand, and feeds soil life. Good options include:
- Finished compost, which is the most versatile choice
- Well-rotted leaf mold, excellent for woodland-style plantings
- Aged manure, which should be composted or well aged to avoid burning roots
- Peat-free compost or coir, useful when you want a lighter, more consistent mix
A common target is to mix 2 to 4 inches of compost into the top 8 to 10 inches of soil. Heavier clay can take the higher end. For timing and top-dressing schedules, see How to Use Compost in Garden Soil: Amounts, Timing and Top-Dressing.
Step 4: Correct Texture if Needed
Adding organic matter helps both clay and sand, but it doesn’t always solve the problem alone. In heavy clay, mixing in coarse materials can improve drainage, though adding sand alone can make clay worse. In very sandy soil, the organic matter does most of the work of holding moisture. If you’re not sure which amendments fit your situation, How to Choose the Right Soil Amendments for Your Garden covers the options in more depth.
Step 5: Adjust pH if Necessary
If your test shows the soil is too acidic, garden lime can raise the pH. If it’s too alkaline, elemental sulfur or acidifying fertilizers can lower it. Change pH gradually. Lime and sulfur act slowly, often taking several months, so apply them ahead of planting when possible. Retest the following season before making further adjustments.
Step 6: Rake, Level, and Let It Settle
Once amended, rake the bed smooth and remove any stones or roots. Water the bed lightly and wait a few days before planting. This lets the soil settle and shows you whether drainage is improving. If the bed sinks noticeably, you may need to top it up with a little more compost.
Step 7: Mulch After Planting
A 2- to 3-inch layer of shredded bark, straw, or leaf mulch keeps moisture in, moderates soil temperature, and slowly adds organic matter as it breaks down. Keep mulch a few inches away from plant stems to prevent rot.
Quick Reference: Common Soil Problems and Fixes
| Problem | Signs | Main Fix |
|---|---|---|
| Heavy clay | Sticky when wet, cracks when dry, slow drainage | Add compost annually, avoid working wet soil |
| Sandy soil | Dries fast, won’t hold shape, nutrients wash out | Add compost, mulch heavily, feed more often |
| Compaction | Hard surface, water runs off, stunted roots | Loosen deeply, add organic matter, keep foot traffic off |
| Acidic soil | Test pH below 6.0 | Apply garden lime based on test recommendations |
| Alkaline soil | Test pH above 7.5 | Add sulfur or acidifying materials, add organic matter |
| Poor drainage | Water pools for hours after rain | Raise the bed, improve structure, consider a raised bed |
Tools and Supplies You’ll Need
- Garden fork or tiller for loosening soil
- Soil test kit or lab sample bags
- Finished compost or other organic matter
- Garden lime or sulfur, if the test calls for it
- Rake and shovel for leveling
- Mulch material for after planting
- Wheelbarrow or tarp for mixing and moving amendments
Tips for Success
- Test your soil every two to three years to track changes.
- Add compost every season rather than all at once, since organic matter breaks down over time.
- Plant perennials into well-prepared soil, because they’ll stay in the same spot for years.
- If you’re new to flower gardening, How to Make a Flower Garden Bed: A Step-by-Step Guide for Beginners shows how these steps fit into the bigger project.
- For beds in hot, dry climates, prepare the soil with extra organic matter and mulch. How to Prepare a Garden Bed for Drought Conditions has more detail.
Common Mistakes
- Digging wet clay. This smears the soil and destroys structure. Wait until it crumbles.
- Adding sand to clay without enough organic matter. This can create a concrete-like mix.
- Using fresh manure. It can burn roots and introduce weed seeds. Use aged or composted manure.
- Applying lime or sulfur without a test. Overcorrecting pH can lock up nutrients and harm plants.
- Burying compost too deep. Most feeder roots sit in the top 6 to 8 inches, so mix amendments into that zone.
- Skipping mulch. Bare soil dries quickly and loses organic matter faster.
Recommended gear
Several tools make soil preparation easier, particularly for beds that need deep loosening. A sturdy digging fork helps you break up compacted layers without tilling the soil into fine dust, which can worsen crusting in clay. If you’re mixing large volumes of compost, a broad garden fork and a wheelbarrow save considerable time.
- A stainless steel border or digging fork for loosening compacted beds View on Amazon
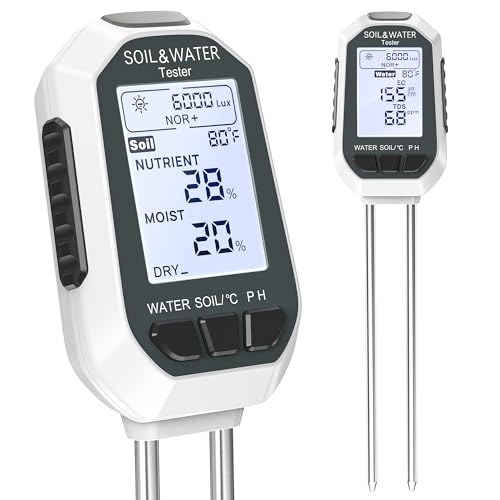
- A soil test kit for checking pH and basic nutrient levels at home View on Amazon
- A wheelbarrow for hauling and mixing compost into beds View on Amazon
- A soil thermometer and moisture meter for monitoring conditions during planting season View on Amazon
FAQ
How deep should garden soil be for flower beds?
Most flowers do well with 12 inches of loosened, amended soil. Deep-rooted perennials and bulbs benefit from 18 inches or more if you can manage it, but 12 inches covers most annual and perennial needs.
How much compost should I add to my flower bed?
A common guideline is 2 to 4 inches mixed into the top 8 to 10 inches of soil. Heavy clay may need the upper end, while sandy soil benefits from regular top-dressing. Your soil test results can help refine the amount.
Can I use potting soil in a flower bed?
Potting mix is designed for containers and drains differently from garden soil. Mixing a small amount into planting holes is fine, but filling an entire in-ground bed with potting mix usually creates drainage problems and can cause water to pool at the interface with native soil.
When is the best time to prepare flower bed soil?
Early spring or fall are usually ideal, once the soil is workable. Amendments like lime need several months to react, so fall preparation for spring planting is a good approach.
How often should I refresh the soil in a flower bed?
Adding a layer of compost once or twice a year keeps most beds productive. A full soil overhaul is rarely needed unless the bed has severe drainage or contamination problems.
Do I need to remove the old soil from a flower bed?
Usually not. Removing soil is labor intensive and often unnecessary if you amend and loosen the existing material. Only replace soil if it’s contaminated, severely degraded, or full of perennial weeds that are hard to control.
Is it safe to use garden soil from my yard for a raised flower bed?
Native soil can be used as a base, but mixing in compost is usually recommended. If you suspect contamination from old structures, lead paint, or industrial sites, have the soil tested before growing food or sensitive plants. A local extension office can advise on testing. For a broader look at bed options, see Garden Soil Basics: Soil Types, pH, Drainage and Compost.
What is the best mulch for flower beds after planting?
Shredded hardwood bark, pine straw, and shredded leaves are all widely used. Choose a material that suits the plants and the look you want, and refresh it every year or two as it breaks down.
Conclusion
Good garden soil for flower beds comes from testing first, then loosening, amending with organic matter, and correcting pH only as needed. Work the soil when it’s ready, and keep adding compost and mulch each season. With that routine, your beds will drain better, hold moisture more evenly, and support stronger, longer-blooming plants.
Ready to choose one?
About Claire Whitaker
Claire Whitaker is part of our editorial team and reviews and edits our plant care Q&A guides, checking product details against manufacturer specifications and owner feedback.