As an Amazon Associate I earn from qualifying purchases. This page may contain affiliate links.
Learning how to make a flower garden bed comes down to five things: picking the right spot, removing the existing grass or weeds, improving the soil, shaping and edging the bed, and planting with spacing that will still look good in two seasons. Done well, you end up with a defined, healthy planting area that drains properly, holds moisture where it counts, and gives your perennials and annuals room to grow. This guide walks through each stage in order, with measurements and a checklist you can follow on a weekend.
Step 1: Choose the Right Location
Before you dig anything, spend a day watching where the sun goes. Most flowering plants need at least six hours of direct sun, though many shade-tolerant perennials such as hostas, astilbe and bleeding heart will do well with four hours of light or dappled shade. Note where water collects after rain, since a bed that stays soggy for more than a day or two will invite root rot in most flowers.
Also consider access. Place the bed where you can reach the center from both sides without stepping into it, usually no more than 3 to 4 feet across for a single-sided bed. If you plan to run a hose or irrigation line, keep the path short. For a broader look at matching sites to plant needs, see How to Plan a Garden: Sun, Space, Zones and Choosing Plants.
Step 2: Decide on Size and Shape
Bed size should match how much time you can realistically spend maintaining it. A good starting size for beginners is around 4 by 8 feet, which is large enough to plant meaningfully and small enough to weed in an hour. Curved beds look attractive, but straight edges are easier to mow around and simpler to cut with a spade. Whatever shape you pick, sketch it on the ground with a garden hose or a line of spray paint before you commit.
Keep the tallest plants toward the back or center if the bed is viewed from one side, and the shortest toward the front. Leave walkways of at least 18 inches if you need to kneel or move a wheelbarrow along the edge.
Step 3: Remove Grass and Weeds
There are three common ways to clear the site:
- Sod cutting: Slice under the turf with a sharp spade or a rented sod cutter, lifting strips 2 to 3 inches deep. This gives the cleanest result and is best for lawns you want fully gone.
- Solarizing: Cover the area with clear plastic for 4 to 6 weeks during hot weather. It kills many weeds and seeds but takes time and needs full sun.
- Sheet mulching: Lay cardboard or several layers of newspaper over the grass, wet it thoroughly, then add 3 to 4 inches of compost or other organic material. This works well for new beds but takes a full season to break down, so plant into it in the following spring or add plants through the mulch.
Whichever method you use, remove perennial weeds with deep taproots, such as dandelion or bindweed, by hand. Leaving them guarantees they return.
Step 4: Test and Prepare the Soil
Good bed soil is loose, crumbly and holds moisture without staying wet. Dig down to at least 8 to 10 inches with a spade or broadfork and check the texture. If the soil forms a hard ball when squeezed and does not crumble, it is likely heavy clay. If it runs through your fingers, it is probably sandy. Both need organic matter.
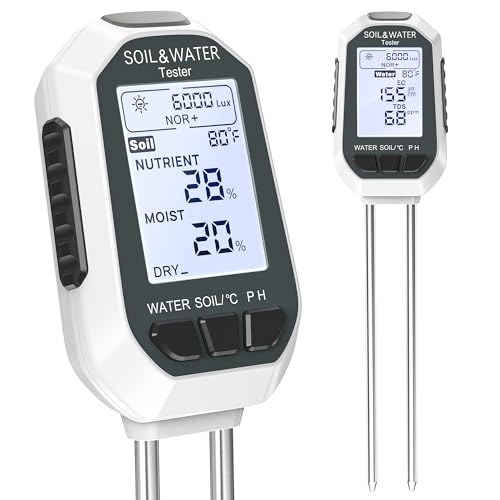
A simple soil test kit from a garden center will show pH and basic nutrient levels. Most flowers prefer a pH between 6.0 and 7.0. For a more detailed walkthrough on adjusting acidity, read How to Test and Adjust Your Garden Soil’s pH Level.
Work 2 to 4 inches of finished compost into the top 8 inches of soil. Mix it thoroughly rather than leaving it in a layer on top. For more on amounts and timing, see How to Use Compost in Garden Soil: Amounts, Timing and Top-Dressing. If your soil is compacted, loosen it deeper before amending, and see How to Fix and Prevent Compacted Garden Soil for methods.
Soil Amendment Guide
| Soil Problem | Amendment | Application Notes |
|---|---|---|
| Heavy clay | Compost, aged bark fines, coarse sand | Mix 3 to 4 inches of compost into the top 8 inches; avoid adding sand alone. |
| Sandy, fast-draining | Compost, peat-free planting mix, shredded leaves | Add 3 to 4 inches of organic matter to hold water and nutrients. |
| Low fertility | Balanced organic fertilizer or well-rotted manure | Follow label rates; apply and incorporate before planting. |
| Acidic (below 6.0) | Garden lime | Apply according to a soil test recommendation and retest after several months. |
| Alkaline (above 7.5) | Elemental sulfur or acidic organic matter | Change slowly over a season; large adjustments can stress roots. |
Step 5: Shape the Bed and Set the Edges
Once the soil is loose, rake the surface level and shape the bed so the center is slightly raised, about 2 to 3 inches above the path. This helps water drain away from the roots. Use a garden rake or a flat spade to define the outline, then cut a crisp edge along the line with an edging spade or half-moon tool.
Edging keeps grass from creeping in and makes the bed look finished. Options include steel or aluminum strip edging, stone, brick, or a shallow trench. If you want ideas for materials and styles, see 8 Best Flower Garden Edging Ideas for Defined Beds in 2026. Bury the edging 2 to 3 inches deep so it stays put through freezes and heavy rain.
Step 6: Plan Your Plantings
Lay out plants on the surface before digging holes. Pots still in their containers work well for this. Follow the spacing listed on each plant tag, and remember that most perennials will fill out to roughly 1 to 2 feet wide within two seasons. Group plants with similar water and sun needs together. Place bulbs at roughly two to three times their own depth, and add a slow-release organic fertilizer to the planting holes if your soil test suggested it.
For plant choices suited to your conditions, check How to Choose the Right Plants for Your Garden Conditions.
Step 7: Mulch and Water In
After planting, water each root zone deeply so the soil settles around the roots. Then spread 2 to 3 inches of mulch over the bed, keeping it a few inches away from plant stems to prevent rot. Shredded hardwood, pine straw and composted leaf mold all work well. For a comparison of options, see How to Choose and Apply Different Types of Garden Mulch.
In the first season, most new beds need about 1 inch of water per week, delivered in one or two deep soakings rather than daily sprinkles. Check with a finger: if the top 2 inches are dry, it is time to water. Our guide on How Often Should You Water Plants? Beds, Containers and Lawns offers more detail.
Tools and Materials Checklist
- Spade and garden fork
- Flat rake and leaf rake
- Edging spade or half-moon tool
- Garden hose or spray paint for marking
- Soil test kit
- Finished compost (2 to 4 inches over the bed)
- Edging material and stakes
- Mulch (2 to 3 inches over the bed)
- Plants, bulbs and seed as planned
- Watering can or hose with a gentle nozzle
Common Mistakes to Avoid
- Skipping the soil work. Planting into compacted or poor soil leads to stunted growth that no fertilizer will fix.
- Making the bed too big. Oversized beds get neglected and fill with weeds by midsummer.
- Ignoring drainage. A bed that sits in standing water will rot roots, even with good soil.
- Planting too close. Crowded plants compete for light and air, which raises disease risk. Follow spacing on the tag.
- Piling mulch against stems. Keep mulch a few inches away from trunks and crowns.
- Skipping edging. Without a border, turf creeps in and blurs the bed line within a year.
Recommended gear
A sturdy hand tool set helps most during the digging and edging stages. Look for a digging spade with a forged steel blade and a solid wood or fiberglass handle. View on Amazon
An edging tool with a sharp half-moon blade makes clean, straight cuts along the bed outline without a lot of strain. View on Amazon
A soil test kit gives you a quick read on pH and basic nutrients before you commit to amendments. View on Amazon
A wide garden fork is useful for loosening compacted subsoil without flipping layers too much. View on Amazon
FAQ
How deep should a flower bed be?
Dig to at least 8 to 10 inches for most flowers. Perennials with deep roots, such as peonies, benefit from even more loosening. Shallow beds tend to dry out faster and restrict root growth.
What is the best time of year to make a flower bed?
Early spring and early fall are the most comfortable times, when soil is workable and temperatures are moderate. You can also build beds in summer if you water consistently.
Do I need to remove all the grass?
For a clean, weed-resistant bed, yes. Grass left in place will compete with flowers and regrow through mulch. Sheet mulching is an option if you prefer not to dig.
How much compost should I add?
A common guideline is 2 to 4 inches of finished compost worked into the top 8 inches of soil. Heavier clay soils benefit from the upper end of that range.
Can I make a flower bed without edging?
Yes, but beds without edging usually need more maintenance to keep grass out. Even a simple shallow trench helps define the line.
How long does it take for a new flower bed to fill in?
Most perennials reach a reasonable size within one to two seasons. Annuals can fill a bed in a single summer, especially if you plant them closer together for an immediate effect.
Should I hire a professional to build a large bed?
For very large areas, heavy sod removal, or significant grading, a landscaping professional can save time and help with drainage planning. Consult a licensed contractor before altering slopes or installing retaining walls.
Conclusion
Making a flower garden bed is mostly about preparation: right location, clean site, loose and well-amended soil, and clear edges. Spend the time on those steps and the planting itself becomes straightforward. Start with a modest size, follow the spacing on your plant tags, and keep the mulch and water consistent through the first season. Your bed will improve each year as the soil builds up and the plants settle in.