As an Amazon Associate I earn from qualifying purchases. This page may contain affiliate links.
An image of a flower garden is easy to picture, but a truly striking one takes planning. In this guide you will learn how to design a flower bed with layered heights, staggered bloom times and a color scheme that reads well in photos and in person. You will also learn how to frame, light and photograph the finished garden so the image of flower garden you capture matches the one you imagined.
Start With a Clear Vision and a Site Assessment
Before you buy a single plant, decide what kind of image you want. A cottage-style border with loose, overlapping blooms looks very different from a formal bed with clipped edges and repeated shapes. Write down two or three reference photos you like, then note what makes them work: the dominant colors, the height of the back row, and whether the bed is viewed from one side or from all sides.
Next, assess the site. Light is the single biggest factor in both plant health and photo quality. Spend a full day noting how many hours of direct sun each spot receives, and mark the results on a rough sketch.
Checklist for Your Site Assessment
- Hours of direct sun per spot: full sun is 6 or more hours, part sun is 3 to 6, and shade is under 3.
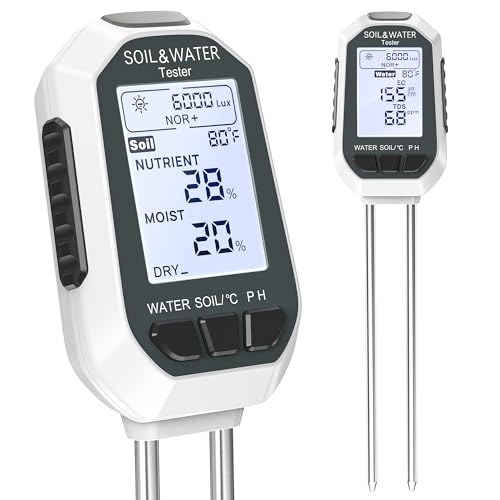
- Soil type: squeeze a moist handful. Sand falls apart, clay holds a ribbon, and loam feels crumbly.
- Drainage: dig a hole about 12 inches deep, fill it with water, and time how long it takes to drain. Under an hour is good for most perennials.
- Background: a fence, hedge or wall behind the bed creates a clean backdrop for photos.
- Viewing angles: note where you will stand or sit to enjoy the bed, and where a camera will likely be placed.
If the soil drains poorly or seems too sandy, you may need amendments. For a full walkthrough, see Understanding Clay, Sandy, and Loam Soil for Your Garden, which explains how to read your soil and what to add.
Plan the Layout: Height, Layers and Bed Shape
Strong images depend on depth. Plant in layers so the eye moves from front to back. A common approach uses three zones:
- Back row (24 to 48 inches tall): delphinium, tall phlox, cosmos, Joe Pye weed or ornamental grasses. Plant these 18 to 24 inches apart so they fill out without crowding.
- Middle row (12 to 24 inches): coneflower, salvia, daylily, bee balm. Space them 14 to 18 inches apart.
- Front edge (6 to 12 inches): catmint, creeping thyme, dianthus, or low sedum. Space these 8 to 12 inches apart.
Bed shape matters too. Island beds (viewed from all sides) should be tallest in the center. Borders against a wall should be tallest at the back. A curved bed photographs more softly than a rigid rectangle, and clean lines along the edge make the whole composition look intentional. If you want crisp outlines, 8 Best Flower Garden Edging Ideas for Defined Beds in 2026 covers options that hold their shape.
Choose a Color Scheme That Reads Well on Camera
Colors that look lovely in person can flatten in photographs, and some combinations fight each other. Start with one of these schemes and build from there.
| Scheme | How It Looks | Example Plants |
|---|---|---|
| Monochrome | Calm, elegant, very cohesive | White cosmos, white foxglove, white phlox |
| Analogous | Harmonious, soft transitions | Purple salvia, lavender, pink echinacea |
| Complementary | Bold and high contrast | Purple coneflower with yellow coreopsis |
| Warm palette | Energetic, sunny feel | Red monarda, orange daylily, gold rudbeckia |
Limit yourself to three or four main colors. Repeat each color in at least three places across the bed. Use white or silver foliage plants such as lamb’s ear or dusty miller as neutral connectors between clashing hues.
Stagger Bloom Times
A photogenic garden is rarely in full bloom all at once. Aim for something flowering in every season from spring through frost. A simple pattern: spring bulbs such as tulips and alliums, early summer peonies and irises, midsummer coneflower and daylily, and late-season asters and sedum. Check tags for bloom windows and mix varieties so the bed always has a focal point.
Plant and Establish the Bed
Once your plan is set, prepare the soil. Loosen the top 10 to 12 inches with a digging fork, then work in 2 to 3 inches of compost. For a deeper look at amending beds, see How to Use Compost in Garden Soil: Amounts, Timing and Top-Dressing. If your pH is off, test it first with How to Test and Adjust Your Garden Soil's pH Level.
Set out plants in the layout you sketched, but leave them in their pots for a few days so you can adjust spacing. Plant at the same depth they grew in their containers, water thoroughly, and mulch with 2 to 3 inches of shredded bark or leaf mold, keeping mulch a few inches away from stems.
In the first season, water new plantings deeply about twice a week during dry weather, rather than shallowly every day. This encourages roots to grow downward. The Water-Efficient Techniques for a Healthy Garden article has more detail on schedules and reducing waste.
Tools Needed
- Digging fork or spade
- Garden hose with a gentle shower nozzle
- Hand trowel and pruners
- Measuring tape or string for spacing
- Shredded bark or compost for mulch
Photograph the Garden Well
The best time to photograph a flower garden is early morning or the hour before sunset, when light is soft and angled. Midday sun creates harsh shadows and washes out color.
- Shoot from a low angle, about knee height, to make the bed look fuller.
- Use a longer focal length (around 50 to 85 mm on a full-frame camera, or a phone’s telephoto lens) to compress the background.
- Set a narrow aperture such as f/8 to f/11 so the whole bed stays in focus, or open wider to f/2.8 to f/4 for a soft, blurred background that highlights a single bloom.
- Remove dead flower heads, weeds and stray leaves before shooting. Small details add up.
- Shoot in a series of frames from several angles and pick the best one later.
Common Mistakes to Avoid
- Planting too densely. New plants look sparse at first, but crowding causes disease and weak stems. Follow spacing on the tag, then fill gaps with annuals in year one.
- Too many colors and varieties. A busy bed rarely photographs well. Repeat a smaller palette.
- Ignoring the off-season. Bare beds in winter look empty. Leave seed heads of coneflower and ornamental grasses standing for texture and winter interest. Using Ornamental Plants for Garden Design and Year-Round Interest explores this further.
- Overwatering the surface. Frequent light sprinkling keeps roots near the top. Deep, less frequent watering builds resilience.
- Skipping weed control. Weeds steal light and water and clutter every photo. Mulch heavily and pull weeds while they are small.
Tips for a Lasting Display
- Deadhead spent blooms on perennials like coneflower and salvia to encourage a second flush.
- Divide crowded clumps of perennials every three to four years in early spring or fall.
- Keep a simple garden journal noting bloom dates, so you can plan gaps for next season.
- Check for pests weekly and address problems early. How to Prevent Plant Diseases in Your Garden outlines prevention steps that protect the whole bed.
Recommended gear
A sturdy hand tool set makes planting and maintenance much easier, especially in clay soil. Look for a digging fork with forged steel tines, which resist bending when you work through compacted ground. View on Amazon
Shredded hardwood mulch keeps soil moist and suppresses weeds around new plants, and it breaks down slowly enough to last a full season. View on Amazon
A gentle shower nozzle on a garden hose protects soft seedlings and fresh soil from erosion while you water. View on Amazon
FAQ
How many plants do I need for a small flower garden?
For a 10-by-10-foot bed, plan on roughly 30 to 45 perennials spaced 14 to 18 inches apart, plus some annuals to fill gaps in the first year. Exact counts depend on the plant size listed on each tag.
When is the best time to plant a flower garden?
In most regions, early spring and early fall are ideal because soil is cool and moist, which reduces transplant stress. Wait until after the last frost before planting tender annuals.
How do I make my flower garden look full faster?
Plant a few fast-growing annuals such as zinnias or cosmos between perennials in the first season, and space perennials at the recommended distance rather than wider.
What is the easiest color scheme for beginners?
A monochrome or two-color scheme is the easiest to pull off. Choose white and blue, or purple and yellow, then repeat those colors throughout the bed.
How much sun do most flowering plants need?
Most flowering perennials and annuals need at least 6 hours of direct sun for best blooming. Shade-tolerant options like hostas and astilbe can handle 3 to 4 hours.
Should I cut back perennials in fall?
You can wait until early spring. Leaving stems and seed heads through winter provides wildlife habitat and visual interest, then you cut them back once new growth appears.
Can I photograph a garden with a phone?
Yes. Use portrait or telephoto mode if available, shoot in soft morning or evening light, and tap to focus on a bloom to keep the foreground sharp.
Conclusion
A memorable image of a flower garden comes from a clear plan: assess your site, layer plants by height, stagger bloom times and limit your colors. Plant with good soil preparation and deep watering, then photograph in soft light from a low angle. With steady maintenance, the bed will look its best season after season.